
The Stereolithography, or SLA 3d printing process creates a prototype layer by layer. The technology uses an ultra-violet laser, a vat of photo-curable liquid resin and a controlling system. After a layer is cured, the building platform drops down by one more layer into the vat of liquid resin. Then again on the next layers, one by one.
At the same time each layer is created, a secondary support structure is also cured into a solid. Layer thickness settings can vary depending on the type of SLA machine used and the budget.
Then, the excess resin is drained upon completion of all layers . The model is taken from the platform, supports are removed and then washed of excess resin. Next parts are placed in a UV oven for final curing.
Most importantly with the SLA 3d printing, the curing process cannot be stopped. Once built, your part will continue to be exposed to UV light. As a result, the part is STILL curing and becoming more brittle with exposure.
SLA 3D Printing Process
- STL file is sliced into layers (from .001”/ .0254mm – .006”/.1524mm thick layers dependent on machine capabilities)
- Building platform drops down by one layer of thickness (.001”-.006”) into the vat of liquid resin, just below the surface
- The ultra-violet laser touches the material, tracing the boundaries and filling in the 2-dimesional cross section of the first layer solidifying the material (at the same time a secondary support structure is solidified when applicable)
- Process is repeated for subsequent layers; platform dropping and next layer applied to the last layer
- Upon completion, the platform is raised out of the vat and the excess resin is drained
- Model is taken from platform where the supports are removed and excess resin is removed or washed away
- Model is placed in a UV oven for final curing
SLA Printing in Laymen’s Terms
 The SLA printing process cures one layer (or slice) of the part and support material at a time. It uses a vat of liquid resin based material and UV light. The thickness of the layers will depend on what is quoted and the customer’s requirements. However the finer the resolution often the higher the cost (as it takes more time to actually build).
Once the prototypes or parts have completed, the tray is lifted up so the material that wasn’t cured can be drained away and recycled. Supports are then removed from the prototype, cleaned away and the part is placed in a UV oven for final curing before use.
In conclusion, Stereolithography (SLA 3d printing), PolyJet and other resin-based processes that require UV light to create the parts have the disadvantage of not being able to fully stop the curing process. As a result, this can compromise the quality of the final part over time.
SLA Advantages:
- Ability to produce translucent parts, various resin materials available
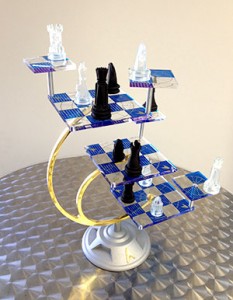
- Can capture fine detail
- Resolution as low as .001”*.0254 mm layers (with some machines and materials)
- Can be sanded with various grits of sandpaper to over time create a smooth surface
SLA Disadvantages:
- Made with materials that can easily break and fracture with normal handling
- Parts continue to cure once completed due to natural U.V. exposure over time making them more fragile as well as yellow and discolour
- Not fully functional prototypes compared to nylon material
- Support contact points are visible on part once removed (can be sanded in some cases)
If you need a durable, functional part then check out the SLS process.
Unsure of which 3D printing technology or material is best for your prototype or project? Please contact us and one of our specialists would be happy to help you out!